Hey there! I’m a supplier in the rubber insulation game, and I’ve been getting a bunch of questions about installing rubber insulation in curved pipes. It’s a bit of a tricky area, but with the right techniques, it can be a breeze. So, let’s dive into it. Rubber Insulation
Why Rubber Insulation for Curved Pipes
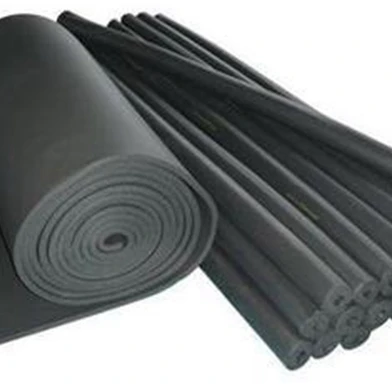
First off, why use rubber insulation in curved pipes in the first place? Rubber insulation is great for curved pipes because it’s flexible. Curved pipes are all over the place in HVAC systems, plumbing, and industrial setups. They can be found in tight corners, around obstacles, or just to change the direction of fluid or gas flow.
Rubber insulation has some sweet properties. It’s got good thermal resistance, which means it can keep the heat in or out depending on what you need. It also has moisture resistance, which is crucial because moisture can lead to corrosion and mold growth in pipes. And it’s fairly easy to work with, which is super important when you’re dealing with those tricky curves.
Measuring and Planning
Before you even think about getting your hands dirty, you need to measure the curved pipes properly. This is probably the most important step. You can’t just eyeball it, especially when it comes to curved pipes.
Get a flexible measuring tape. Wrap it around the pipe at various points along the curve to get an accurate circumference. Make sure you measure the length of the curved section too. Write down these measurements carefully. You don’t want to mess up here because using the wrong size insulation can lead to gaps, which defeats the purpose of the insulation.
Once you have the measurements, it’s time to plan how you’re going to cut and install the rubber insulation. You might need to make multiple cuts or use different techniques depending on the complexity of the curve. For instance, if it’s a gentle curve, you might be able to use a single piece of insulation. But if it’s a sharp curve, you might need to make several overlapping cuts to get the insulation to fit properly.
Cutting the Rubber Insulation
Cutting the rubber insulation is where things start to get a bit more hands – on. You’ll need a good pair of utility knives or scissors specifically designed for cutting rubber. Make sure the blades are sharp because dull blades can tear the insulation and make the edges uneven.
If you’re using pre – slit rubber insulation, it can make things a lot easier. You can slide it onto the pipe and then make any necessary adjustments. But if you’re using non – slit insulation, you’ll have to be a bit more precise with your cuts.
Start by marking the insulation based on your measurements. Use a straightedge or a piece of cardboard as a guide to make straight cuts. If you need to make curved cuts for the pipe curve, take your time and make small, incremental cuts. It’s better to make a few small cuts and adjust than to make one big mistake.
Installation Techniques
Overlapping Method
One of the most common techniques for installing rubber insulation in curved pipes is the overlapping method. This works well for both gentle and sharp curves.
First, start at one end of the curved section. Line up the edge of the insulation with the end of the pipe. Then, wrap the insulation around the pipe, making sure to overlap the edges slightly. The overlapping area helps to prevent heat transfer and moisture from seeping in between the seams. Secure the insulation in place as you go. You can use insulation tape or adhesive, whichever is recommended for your specific rubber insulation product.
As you move along the curve, keep adjusting the overlap. If the curve is getting tighter, you might need to make the overlap a bit wider. If it’s a gentle curve, you can keep the overlap consistent. Make sure the insulation stays snug against the pipe at all times.
Segmenting Method
For really sharp curves, the segmenting method can be a lifesaver. This involves cutting the insulation into smaller segments and then installing them one by one.
First, determine how many segments you need based on the curve. Mark the insulation and make the cuts. You’ll have a bunch of small pieces of insulation. Start installing the segments from one end of the curve. Apply some adhesive on the inside of each segment and on the pipe surface where it will be placed.
Place the first segment on the pipe and press it firmly. Make sure it’s aligned correctly. Then, move on to the next segment. You can overlap the segments slightly or butt them up against each other, depending on the type of insulation and the requirements. Use tape or more adhesive to secure the segments in place. This method takes a bit more time, but it gives you a better fit for those really tight curves.
Securing the Insulation
Once you’ve got the insulation in place, you need to make sure it stays there. You can’t just leave it hanging loose.
As I mentioned earlier, insulation tape is a popular choice. It’s easy to use and provides a good seal. You can wrap the tape around the insulation seams and edges to hold everything together. Make sure to use high – quality tape that’s designed for use with rubber insulation. It should be able to withstand the temperature and environmental conditions of the pipes.
Adhesive is another option. There are special adhesives for rubber insulation that can bond the insulation to the pipe and to itself. Apply the adhesive carefully according to the manufacturer’s instructions. Make sure you don’t get it on your hands or clothes, as it can be sticky and hard to clean off.
Finishing Touches
After you’ve installed and secured the insulation, take a look at the whole setup. Check for any gaps or loose areas. If you find any, you can use additional insulation pieces or some more tape or adhesive to fix them.
You might also want to consider adding a protective covering over the insulation. This can help to prevent damage from physical impact, UV rays, or other environmental factors. There are different types of protective coverings available, such as PVC jackets or metal sheets.
Conclusion
Installing rubber insulation in curved pipes might seem like a tough task, but with the right techniques, it can be done effectively. Measuring and planning are key, so take your time with those steps. Cutting the insulation accurately and using the right installation method, whether it’s overlapping or segmenting, will ensure a good fit. Securing the insulation properly and adding the finishing touches will make your installation last.
Fire Rated Duct Wrap If you’re in the market for high – quality rubber insulation for your curved pipes or any other piping needs, I’m here to help. I’ve got a wide range of rubber insulation products that are durable and easy to work with. Reach out to me for more information, and we can get a sourcing discussion going.
References
- HVAC Installation and Maintenance Handbook
- Rubber Insulation Product Manuals
- Plumbing and Piping Industry Standards for Thermal Insulation
Langfang Yafeng Energy-Saving Technology Co., Ltd.
As one of the most professional rubber insulation manufacturers and suppliers in China, we’re featured by quality products and good price. Please rest assured to buy bulk premium rubber insulation for sale here from our factory. Welcome to view our website for more information.
Address: Langfang Xinyafeng, Liugezhuang Town, Dacheng County, Langfang City, Hebei Province
E-mail: yafengbaowen@gmail.com
WebSite: https://www.xyfinsulation.com/
